jacuzzi j-345 manual français
Jacuzzi J-345 Manual Français: A Comprehensive Guide
Discover essential guidance for your Jacuzzi J-345, including safety, setup, operation, maintenance, and troubleshooting—all conveniently available in Français via PDF downloads.
The Jacuzzi J-345 is a popular spa model known for its hydrotherapy features and comfortable design. This introduction to the Jacuzzi J-345 Manual Français provides owners in France and French-speaking Canada with essential information for optimal spa enjoyment. Accessing the manual, available as a PDF, is crucial for understanding all aspects of operation, maintenance, and safety protocols.
This guide ensures users can fully utilize the spa’s capabilities, from initial setup to regular cleaning, all while adhering to French regulations and water treatment standards. Proper use, as detailed within, guarantees a safe and relaxing experience.
Understanding the French Manual
The Jacuzzi J-345 Manual Français is specifically tailored for users in France and French-speaking regions, offering detailed instructions in their native language. It covers everything from initial setup and water chemistry to troubleshooting common issues and understanding warranty information specific to France.
This PDF document ensures clarity and accessibility, guiding owners through safe operation and maintenance procedures. Familiarizing yourself with the manual’s contents is vital for maximizing your spa experience and adhering to local regulations.

Safety Precautions & Important Information
Prioritize safety! The manual details crucial guidelines, electrical precautions, and water chemistry maintenance for a secure and enjoyable Jacuzzi J-345 experience.
General Safety Guidelines
The Jacuzzi J-345 manual emphasizes responsible spa usage for all users. Always supervise children closely when the spa is in use, preventing unsupervised access to avoid drowning risks. Individuals with medical conditions, pregnant women, and those sensitive to heat should consult a physician before using the spa.
Avoid using the spa while under the influence of alcohol or drugs, as this impairs judgment and increases the risk of accidents. Maintain a clean and uncluttered spa area to prevent slips and falls. Regularly inspect the spa for any damage or hazards, addressing them promptly. Proper adherence to these guidelines ensures a safe and relaxing experience.
Electrical Safety
The Jacuzzi J-345 manual stresses crucial electrical safety precautions. Ensure the spa is connected to a dedicated, grounded circuit with the correct voltage, adhering to French electrical regulations; Never operate the spa with damaged cords or plugs; replace them immediately. Avoid using extension cords.
Qualified personnel should perform all electrical installations and repairs. Keep electrical components dry and protected from water. Disconnect power before performing any maintenance. Ignoring these warnings can lead to electric shock, fire, or equipment damage, compromising user safety and spa functionality.
Water Chemistry & Maintenance
Maintaining proper water chemistry is vital for a safe and enjoyable Jacuzzi J-345 experience, as detailed in the Français manual. Regularly test and balance pH, alkalinity, and sanitizer levels using recommended chemicals, considering local French water quality.
Consistent water maintenance prevents corrosion, scaling, and bacterial growth. The manual outlines cleaning procedures for filters and surfaces, alongside guidance on water drainage and refilling. Adhering to these guidelines ensures water clarity, protects spa components, and safeguards user health.
Setting Up Your Jacuzzi J-345
The Français manual guides initial setup, including filling, starting the spa, and connecting to power—ensuring a smooth and safe installation process for your Jacuzzi.
Initial Setup Procedures
The Jacuzzi J-345 Manual Français meticulously details the initial setup, emphasizing careful preparation before operation. It instructs users to verify all components are present and undamaged upon unboxing. The manual stresses the importance of selecting a level, stable surface capable of supporting the spa’s filled weight.
Detailed diagrams illustrate proper placement concerning electrical access and drainage. Before filling, the manual advises inspecting all plumbing connections for leaks. It also highlights the necessity of reading the complete manual to understand all safety precautions and operational guidelines before proceeding with the setup process.
Filling and Starting the Spa
The Jacuzzi J-345 Manual Français provides clear instructions for filling your spa, recommending a specific water level for optimal jet function. It emphasizes using a pre-filter when filling to protect the heater and pump from debris. The manual details the initial startup sequence, advising users to power on the spa after filling to prevent pump damage.
It also explains the importance of purging the lines to remove any air, and how to prime the pump if necessary. The manual cautions against operating the spa until water chemistry is properly balanced, referencing the water chemistry section for detailed guidance.
Connecting to Power
The Jacuzzi J-345 Manual Français stresses the importance of qualified electrical installation adhering to French regulations. It details specific voltage and amperage requirements for the J-345 model, emphasizing the need for a dedicated circuit breaker. The manual illustrates proper grounding procedures to ensure user safety and prevent electrical hazards.
It warns against using extension cords and provides guidance on the location of the GFCI (Ground Fault Circuit Interrupter). Before connecting, verify the power supply matches the spa’s specifications, as outlined in the manual’s electrical section.
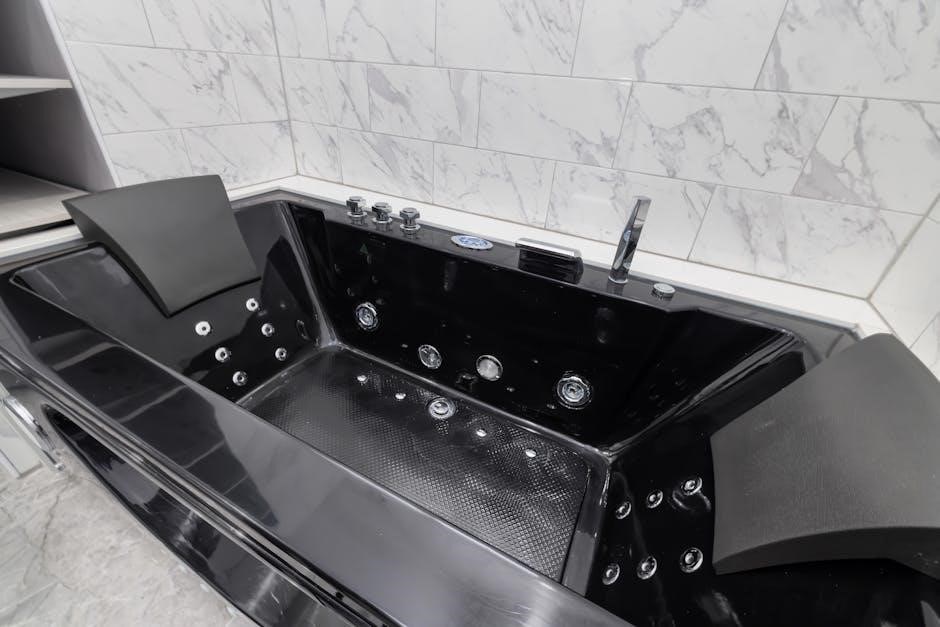
Operating the Control Panel
The Jacuzzi J-345 Manual Français explains navigating the interface, adjusting temperatures, and controlling jets—all essential for a personalized spa experience in Français.
Navigating the Control Panel Interface
The Jacuzzi J-345 Manual Français details a user-friendly control panel designed for intuitive operation. It guides users through understanding the icons, buttons, and display screens, all presented in clear Français. Learn to access various functions, including temperature adjustments, jet controls, and lighting options. The manual emphasizes a step-by-step approach to mastering the interface, ensuring a seamless spa experience. It clarifies how to cycle through different menus and interpret the information displayed, allowing for effortless customization of your Jacuzzi settings. Familiarize yourself with the panel’s responsiveness and features for optimal control.
Adjusting Temperature Settings
The Jacuzzi J-345 Manual Français provides detailed instructions on precisely adjusting water temperature. It explains how to utilize the control panel to increase or decrease heat, ensuring comfortable soaking. The manual stresses the importance of gradual adjustments to avoid sudden temperature changes. It outlines recommended temperature ranges for optimal relaxation and safety, all clearly translated into Français. Learn to monitor the current water temperature and set desired levels. Understanding these settings guarantees a personalized and enjoyable spa experience, tailored to your preferences and well-being.
Jet Control Functions
The Jacuzzi J-345 Manual Français thoroughly explains the various jet control functions. It details how to activate, deactivate, and adjust the intensity of different jet zones for a customized hydrotherapy experience. The manual illustrates how to cycle through jet sequences, targeting specific muscle groups. It clarifies the purpose of each jet type – from powerful massage jets to gentle relaxation jets – all described in clear Français. Mastering these controls allows users to personalize their spa session, maximizing therapeutic benefits and overall enjoyment.
Maintenance & Cleaning
The Jacuzzi J-345 Manual Français provides detailed instructions for filter cleaning, surface care, and water drainage—ensuring a pristine and hygienic spa experience.
Filter Cleaning & Replacement
The Jacuzzi J-345 Manual Français emphasizes regular filter maintenance for optimal spa performance. It details a step-by-step process for removing, cleaning, and rinsing the filter cartridge, ensuring debris is effectively eliminated. The manual specifies cleaning frequency—typically every two weeks or as water pressure declines—and provides guidance on using a filter cleaning solution.
Furthermore, it outlines the procedure for filter replacement, recommending a new cartridge annually or when cleaning no longer restores adequate flow. Proper filter care, as described in the manual, extends the lifespan of the spa and maintains water clarity.
Surface Cleaning Procedures
The Jacuzzi J-345 Manual Français provides detailed instructions for maintaining the spa’s acrylic surface. It recommends using mild soap and water with a soft cloth to avoid scratching. Avoid abrasive cleaners, scouring pads, or harsh chemicals, as these can damage the finish. The manual advises regular wiping to prevent buildup of oils and lotions.
Specific attention should be given to cleaning around jets and lights. The manual also suggests using a dedicated acrylic cleaner and polish for enhanced shine and protection, ensuring the longevity and aesthetic appeal of your Jacuzzi spa.
Water Drainage & Refilling
The Jacuzzi J-345 Manual Français outlines a specific procedure for draining the spa water, emphasizing safety precautions. It details locating and accessing the drain valve, and recommends using a submersible pump for faster emptying. After draining, the manual instructs thorough cleaning of the shell before refilling.
When refilling, it stresses the importance of using a pre-filter to remove debris and balancing the water chemistry immediately. The manual provides guidance on proper water levels and initial chemical adjustments, ensuring a clean and safe bathing experience.

Troubleshooting Common Issues
The Jacuzzi J-345 Manual Français details error codes, pump/heater problems, and control panel malfunctions, offering solutions for optimal spa performance.
Error Codes & Their Meanings
The Jacuzzi J-345 Manual Français provides a comprehensive list of error codes displayed on the control panel. These codes are crucial for diagnosing issues within your spa system. Each code corresponds to a specific problem, ranging from temperature sensor failures to pump malfunctions or heater errors.
Understanding these codes, as outlined in the manual, allows owners to quickly identify the source of the problem and potentially resolve it themselves, avoiding unnecessary service calls. The manual details the meaning of each code and suggests possible solutions or steps for further investigation, ensuring efficient troubleshooting.
Pump & Heater Problems
The Jacuzzi J-345 Manual Français addresses common pump and heater issues. Problems can include the pump failing to start, reduced water flow, or unusual noises; Heater malfunctions might manifest as insufficient heating, error codes related to temperature sensors, or complete heater failure.
The manual guides users through basic troubleshooting steps, like checking the circuit breaker and filter, before recommending professional service. It emphasizes safety precautions when inspecting these components and provides diagrams to aid in identifying parts, ensuring proper diagnosis and repair.
Control Panel Malfunctions
The Jacuzzi J-345 Manual Français details troubleshooting steps for control panel issues. Common problems include a frozen screen, unresponsive buttons, inaccurate temperature readings, or error messages. The manual instructs users to first attempt a system reset, often involving power cycling the spa.
It also explains how to interpret specific error codes displayed on the panel, linking them to potential causes like sensor failures or communication errors. If issues persist, the manual advises contacting Jacuzzi customer support for further assistance and potential component replacement.

Detailed Component Overview
The Jacuzzi J-345 Manual Français provides in-depth explanations of the pump, heater, and jet systems, detailing their functions and maintenance requirements for optimal performance.
Pump System Explained
The Jacuzzi J-345 Manual Français meticulously details the spa’s pump system, outlining its crucial role in water circulation, filtration, and jet operation. It explains the pump’s components – motor, impeller, and housing – and their interplay. Understanding the pump’s function is vital for diagnosing issues like reduced jet pressure or unusual noises.
The manual clarifies pump start-up procedures, routine maintenance (like priming), and troubleshooting common problems. It also emphasizes the importance of proper pump operation for maintaining water quality and extending the lifespan of the entire spa system, ensuring a relaxing and hygienic experience.
Heater & Temperature Sensors
The Jacuzzi J-345 Manual Français provides a detailed explanation of the heating system and temperature sensors. It clarifies how the heater maintains the desired water temperature, referencing the role of the high-limit switch for safety. The manual illustrates the location of temperature sensors and their function in accurately monitoring water conditions.
Troubleshooting guidance is included for issues like inaccurate temperature readings or heater malfunctions. Proper understanding of these components, as outlined in the manual, is essential for efficient spa operation and maintaining a comfortable soaking experience.
Jet System Breakdown
The Jacuzzi J-345 Manual Français offers a comprehensive breakdown of the jet system, detailing each jet type and its specific therapeutic benefits. It illustrates the jet plumbing layout, explaining how water is circulated and directed for optimal hydrotherapy. The manual clarifies how to adjust jet intensity and directional flow.
Troubleshooting sections address common jet-related issues, such as reduced flow or malfunctioning jets. Understanding the system’s components, as described in the manual, ensures proper maintenance and maximizes the spa’s relaxation and wellness features.
Warranty Information (France)
The Jacuzzi J-345 Manual Français details specific warranty coverage for French customers, outlining claim procedures and applicable terms for your spa.
Warranty Coverage Details
The Jacuzzi J-345 Manual Français meticulously outlines the warranty specifics for owners in France. Coverage typically includes components like the pump, heater, and control panel, with durations varying based on the part. Shells generally have a longer warranty period.
It’s crucial to register your spa promptly to activate the warranty. The manual details what voids the warranty, such as improper installation, misuse, or unauthorized repairs. Understanding these details, as presented in the Français manual, ensures you maximize your coverage and enjoy peace of mind with your Jacuzzi.
Claim Procedures
The Jacuzzi J-345 Manual Français provides a clear, step-by-step guide for submitting warranty claims within France. Typically, you’ll need to contact Jacuzzi France customer support, providing proof of purchase and a detailed description of the issue.
Photographic or video evidence is often requested to support your claim. The manual specifies authorized service centers for repairs. Retain all documentation related to the claim, including repair invoices. Following these procedures, as outlined in the Français manual, ensures a smooth and efficient claim resolution process.

Jacuzzi France Contact Information
For assistance with your Jacuzzi J-345, consult the Manual Français for dedicated customer support channels and authorized service center locations in France.
Customer Support Channels
Accessing Jacuzzi France’s customer support is crucial when navigating your J-345, especially utilizing the Manual Français. Begin by exploring the official Jacuzzi France website (www.jacuzzi.fr) for frequently asked questions and online resources. Direct email support is available at email160;protected, offering personalized assistance.
For immediate concerns, consider contacting Jacuzzi SPA AND BATH LTD. at their listed phone number. Remember to have your model number and purchase details ready for efficient service. The Manual Français often contains specific contact details tailored to your region within France, ensuring localized support.
Service Center Locations
Locating authorized Jacuzzi service centers in France is vital for J-345 maintenance and repairs, particularly when referencing the Manual Français for specific issues. While precise locations aren’t directly provided in the snippets, Jacuzzi France’s website (www.jacuzzi.fr) serves as the primary resource for finding nearby certified technicians.
Contacting Jacuzzi SPA AND BATH LTD directly can also yield a list of authorized service providers in your specific region. The Manual Français may contain regional contact information. Ensure the technician is Jacuzzi-certified to guarantee quality service and valid warranty support for your spa.

PDF Manual Availability & Download
Access 13 Jacuzzi J-345 manuals in PDF format, including the Manual Français, for free download—providing comprehensive guidance for your spa’s operation and care.
Locating the Official PDF Manual
Finding the official Jacuzzi J-345 Manual Français in PDF format is crucial for proper spa ownership. Begin your search on the official Jacuzzi France website – www.jacuzzi.fr – navigating to their support or manuals section. Look for dedicated pages listing downloadable resources, specifically categorized by model number (J-345).
Alternatively, utilize search engines like Google, employing precise keywords such as “Jacuzzi J-345 Manual Français PDF” to pinpoint direct download links. Ensure the source is reputable to avoid potentially compromised files. Prioritize downloads directly from Jacuzzi’s official domain for guaranteed authenticity and the most up-to-date information.
Downloading & Saving the Manual
Once you’ve located the Jacuzzi J-345 Manual Français PDF, initiate the download process by clicking the provided link. Your browser will prompt you to choose a save location on your computer or device. Select a readily accessible folder, such as “Documents” or a dedicated “Spa Manuals” directory, for easy retrieval.
After the download completes, verify the file’s integrity by opening it to ensure it’s fully accessible and readable. Consider creating a backup copy on an external drive or cloud storage to safeguard against data loss. Regularly updating to the latest version, if available, is also recommended.

French Specific Regulations
Ensure your Jacuzzi J-345 complies with all relevant French electrical standards and regulations for safe installation and operation within France.
Compliance with French Standards
Jacuzzi spas distributed in France are designed to adhere to stringent French safety and performance standards. This includes rigorous testing for electrical safety, water quality compatibility, and overall operational integrity. The J-345 model specifically undergoes evaluation to meet Normes Françaises, ensuring user wellbeing and regulatory adherence.
Proper installation, following the manual’s guidelines, is crucial for maintaining compliance. Ignoring these standards could void warranties and potentially create hazardous conditions. Always consult a qualified electrician for connections and verify adherence to local regulations.
Electrical Regulations in France
France maintains specific electrical regulations, notably the Norme NF C 15-100, governing installations like Jacuzzi spas. These regulations prioritize safety, demanding qualified electricians perform all connections and grounding. The J-345 requires a dedicated circuit with appropriate amperage and earth leakage protection (RCD/GFCI).
The manual emphasizes adherence to these rules. Incorrect wiring or inadequate protection can lead to electric shock or fire hazards. Always verify compatibility with local power supply specifications before installation and consult the manual for detailed electrical requirements.
Understanding Water Treatment in France
French water quality varies; the manual recommends specific chemicals for optimal sanitation and balance, ensuring a safe and enjoyable Jacuzzi J-345 experience.
Recommended Chemicals
Maintaining proper water chemistry is crucial for a safe and enjoyable Jacuzzi J-345 experience, particularly adhering to French regulations. The manual details recommended sanitizers like chlorine or bromine, alongside pH balancers and alkalinity adjusters. Calcium hardness control prevents corrosion or scaling.
Regular testing with a reliable kit is essential, as French water sources can vary significantly. Always follow dosage instructions carefully, prioritizing user safety and spa longevity. Consider using a non-foaming defoamer if needed, and shock the water periodically to oxidize contaminants. Refer to the manual for specific product compatibility and guidelines.
Local Water Quality Considerations
France exhibits diverse water hardness levels, impacting Jacuzzi J-345 maintenance. Hard water, common in certain regions, necessitates increased chemical usage to prevent scale buildup and maintain optimal pH balance. Conversely, soft water may require calcium hardness boosters.
The manual emphasizes testing your source water before initial filling and regularly thereafter. Local regulations may also influence acceptable chemical levels. Understanding your specific water profile ensures efficient sanitation, protects the spa’s components, and provides a comfortable bathing experience, aligning with French standards.